
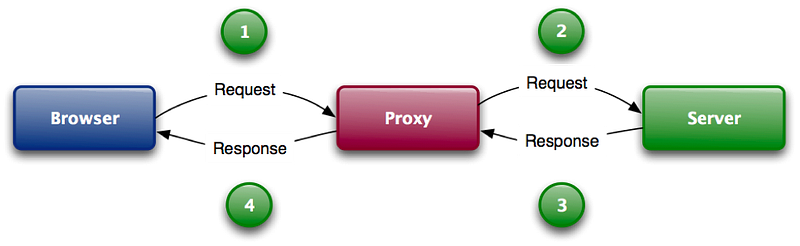
Let’s take a look at HTTP proxies, the core tool for web app hackers. When you’re getting started as a hacker, an HTTP proxy is an application that runs between the browser and the server, allowing you to intercept, view, and modify HTTP requests and responses.
My favorite proxy to use is a tool called Burp, which is free and can be downloaded here (http://portswigger.net/). The free version is all we need.
Here is how you setup Burp:
First, download and run Burp locally (it’s a java app, so you may need to install the Java JRE if you don’t already have it). Next, we have to configure a few settings to ensure our browser uses Burp. I prefer to use Firefox with Burp, you can set it up without having to change system-wide settings which affect a number of programs.
After starting Burp, click on the “Proxy Tab”, then on “Options”:
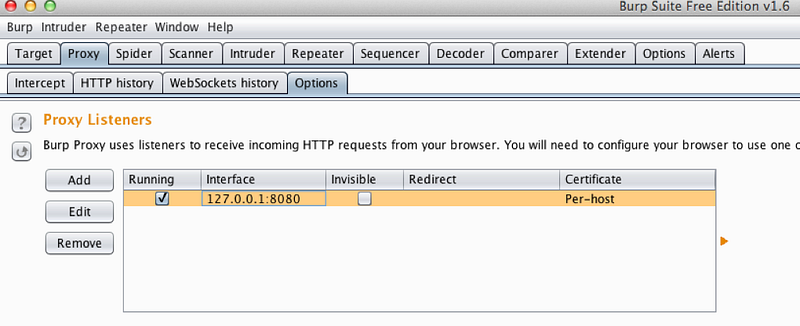
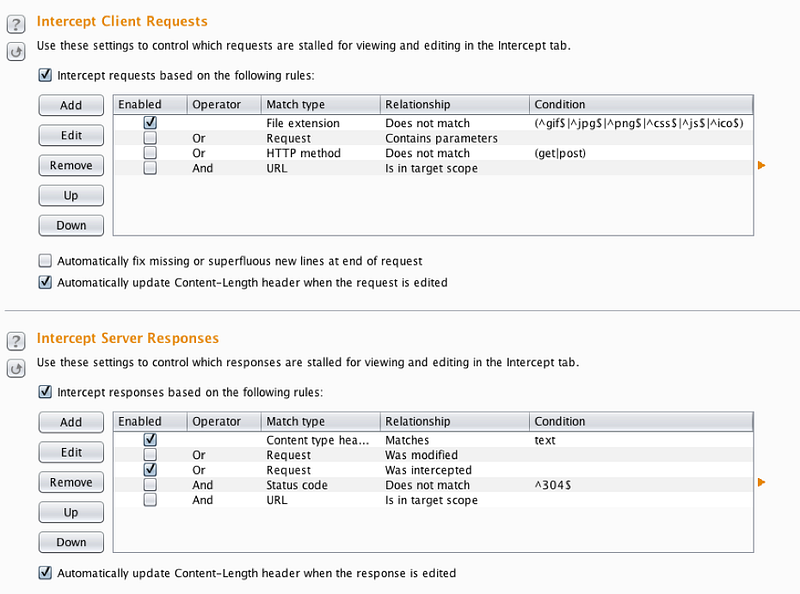
Make sure the “Proxy Listeners” is running and make note of the interface, by default it is 127.0.0.1:8080. Next, scroll down to the “Intercept Client Requests” and “Intercept Server Responses” sections. Make sure the top level “Intercept requests based on the following rules” and “Intercept responses based on the following rules” are both checked. Additionally, you will want to check the third checkbox under “Intercept Server Responses” which states “Or Request Was Intercepted”. Your settings should match the screenshot below:
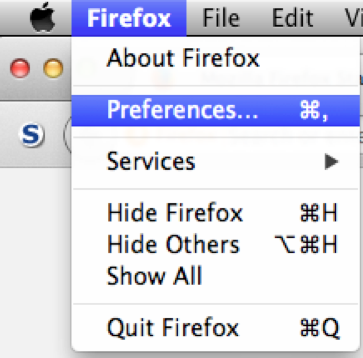
This will let Burp capture both the browser requests and the server responses. Next, we need to setup Firefox to use Burp as a proxy. Click on “Firefox”, then “Preferences”.
Now click on the Advanced Icon, then the Network button. It should look like the screen below:

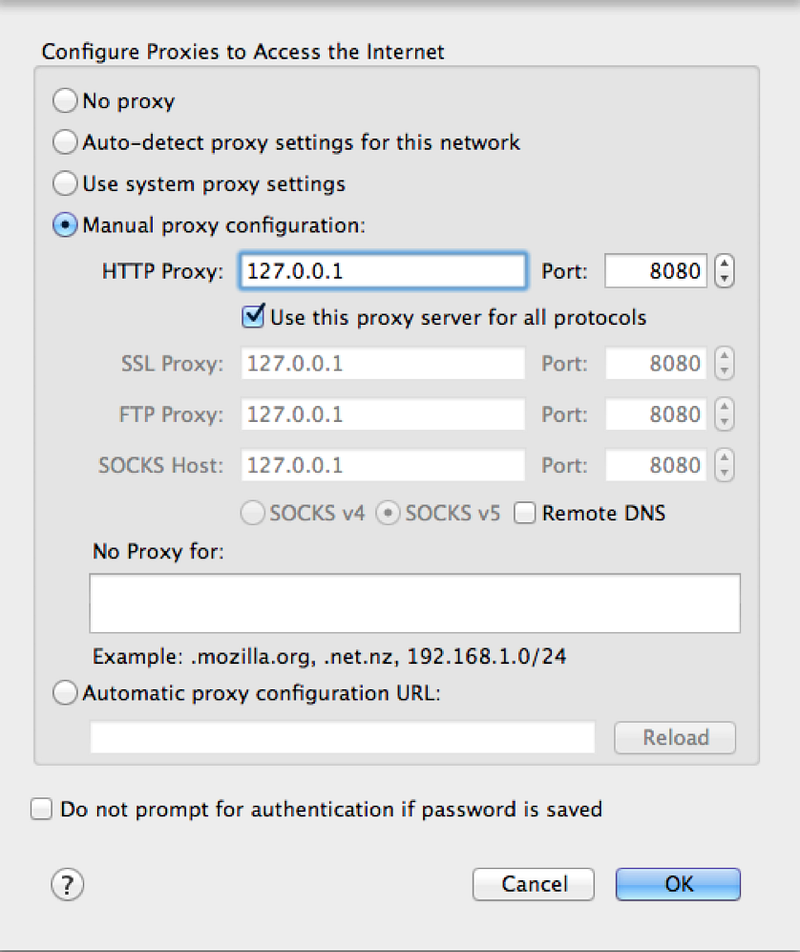
Finally, the last step is to change the network settings. Under Connection, Configure how Firefox connects to the Internet, click on the settings button.
Change the settings so it matches the screenshot below. Select Manual Proxy Configuration and set the IP address and Port to match Burps settings, which defaults to 127.0.0.1 port 8080. Check the box to “use this proxy server for all protocols”. Finally, remove the settings in the box which says “No Proxy for” to make sure we capture local traffic (such as requests and responses to our local rails app). Click OK and then you’re all set!
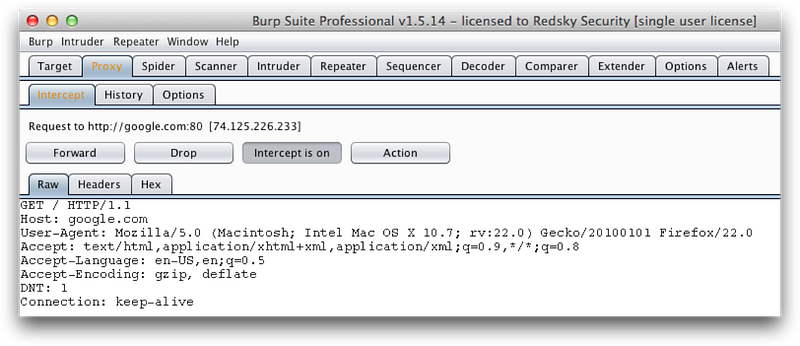
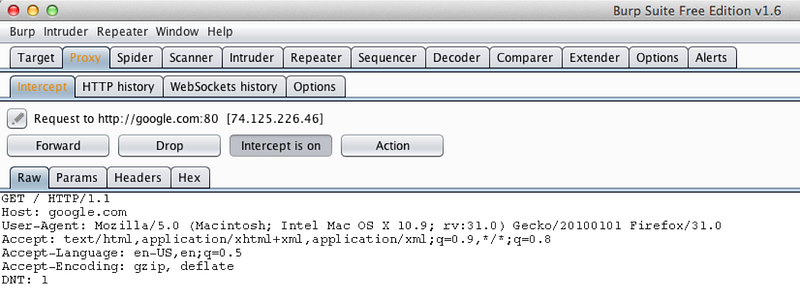
Now, let’s test our setup and make sure it works. Back in Firefox, enter google.com and click Enter. If everything is setup correctly, then the browser should just hang there, waiting for the website. Your request has been captured by Burp! Go back to Burp, and you should see the HTTP request to Google in the proxy, then Intercept tab. Make sure you’re looking at the right screen on Burp. There are a ton of options, but it should look like the screen below:
Now, click the Forward button to send the request to the server. You should almost immediately get the server’s response. You then need to click the Forward button again to send the server response to the browser:
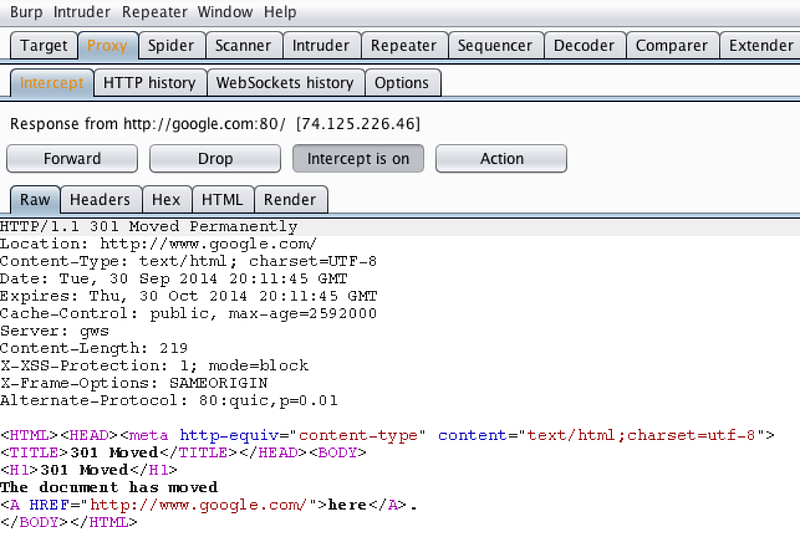
The server response to our original request to google.com is a 301 redirection (“Moved Permanently”), which tells our browser in the location header to go to www.google.com. The browser now automatically makes this request for us and you can safely forward on this request and the response. Google once again makes another redirection, this time to the SSL version of google. However, this presents a problem.
In order for Burp to connect to SSL sites, it intercepts the connection and presents its own SSL certificate to the browser. That way, Burp can still decrypt the HTTP request and response even through SSL is being used. However, the browser is smart enough to tell whether or not the SSL certificate is valid and will provide a warning to the user that the SSL certificate is not valid for the site:
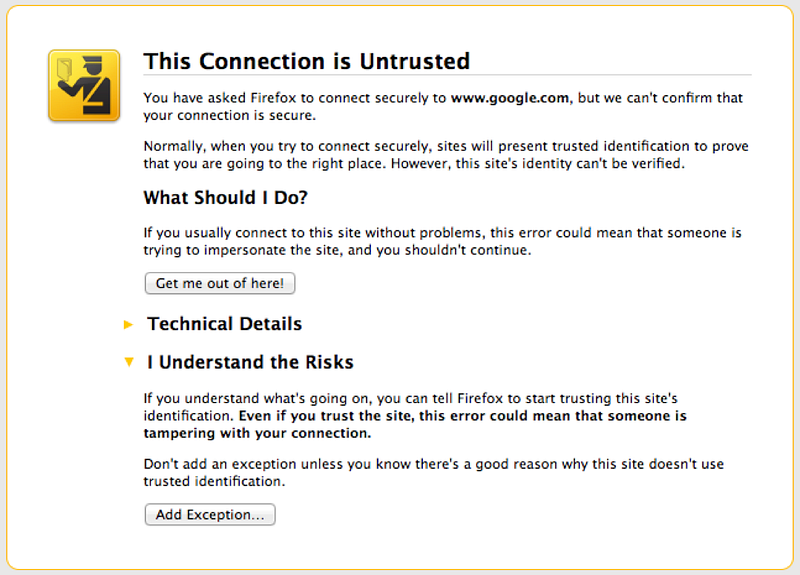
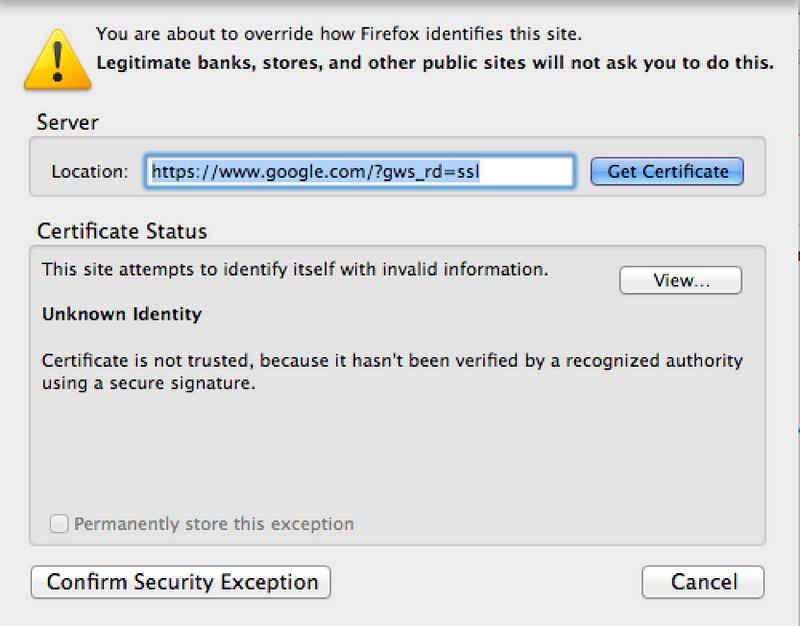
Since we know we are using Burp to intercept the request, we can click on “I Understand the Risks” and then the “Add Exception” button, adding Burps SSL certificate. Next click on “Confirm Security Exception” so that the browser will let us use Burp for this SSL connection. A word of warning: Be careful when accepting this and make sure you are using Burp, otherwise do not add the exception.
Ok, now the browser makes the SSL request, which is once again captured in Burp. Keep forwarding the requests and responses until the browser shows the Google homepage.
Congratulations, you have now just taken your first step to being a web hacker!
Before we move on to hacking our first site, lets go over a few quick items that can sometimes cause problems.
Common Problems and Solutions
1. Website doesn’t show in browser
Burp will capture every request and response and wait for you to forward it to either the server or the browser. Often times, these requests and responses will queue up in Burp, and it looks like the browser has stopped responding or you cannot access the site. If you run into problems and it seems like its not working, check the proxy tab in Burp and make sure there are no requests queued up. If you are not going to manually inspect the requests and responses for a little while, its useful to toggle off the intercept mode which will just allow the requests and responses to flow freely.

2. Weird Traffic
Occasionally when using Burp, you will notice a few web requests you didn’t make. This is traffic that is either sent from a browser plugin, or from the browser itself. If you setup the proxy to be the system proxy, then you may also get other interesting traffic from other applications. Most of this traffic is harmless, but it’s useful to know what chatting plugins or applications you have on your system that are making requests. Sometimes these requests leak sensitive information so they may require a deeper inspection.
3. Proxy is refusing connections
Burp is setup and running, and the browser is configured to use Burp, but when making a request to a website in the browser you get an error message that the proxy is refusing connections. Generally this occurs because you have the wrong IP address or port for the proxy, or it’s not running. Double check both the proxy settings and the browser settings and make sure they line up.
4. No server responses
Often times you will see the browser request but not the server response. When this happens, more than likely you missed the setting in Burp to intercept the server responses. Go back to Burp, go to the Proxy tab, then the Options tab, scroll down and make sure that the “Intercept Server Responses” settings match the settings shown above.
OK, now that we have a proxy running, we can intercept traffic. Let’s start hacking away.